
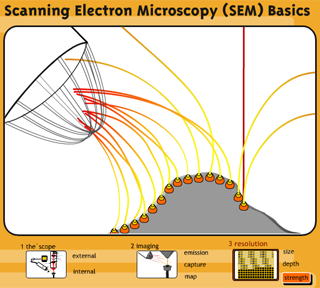
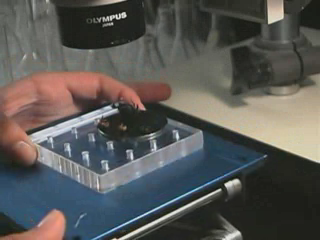
Scanning electron microscopy (SEM) is very different from the light microscopy that most are familiar with. To help participants get the most out of their live Bugscope session we've created some learning materials. First is an animation that introduces the components of an electron microscope, describes how an image is formed, and explains how the microscope magnifies that image. Second, we produced a short video following one of our staff members through the process of preparing a school's insects to be viewed in the SEM.
With a basic understanding of how SEM works you will be able to choose more appropriate samples and create a successful plan for investigating them. Electron microscopy is very different than human vision and some things we take for granted, such as color and translucency, will not be seen. For example, although an SEM has the resolution to see cellular components, the SEM only "sees" the outer surface of the cell membrane whereas a light microscope would see right through.
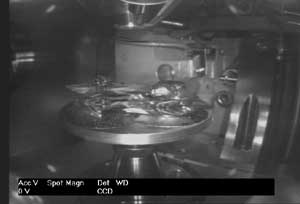
The scanning electron microscope creates an image as if you were observing the sample from above. To view different parts of the sample the sample stage moves left and right to change which area is under the electron beam. The sample stage can also be rotated, moved up and down and — although only by hand — tilted to see samples from a different angle.
Magnification in a scanning electron microscope is achieved in a fundamentally different way from light microscopy, where glass lenses bend rays of light to enlarge the image. The image from an SEM is gathered by scanning the electron beam across the surface of the sample line by line, left to right and top to bottom, in the same pattern your eyes make when reading a book. This is called a raster pattern. In an SEM, magnification is the difference between the size of the scanned area on the sample surface and the size of the display showing the resulting image. For example, if the raster pattern on the sample was 1mm by 1mm and the displayed image was 10cm by 10cm, the magnification would 100x.
The size of the SEM's raster pattern (and thus, magnification) is controlled by a series of electromagnetic coils, called the scan coils, which bend the path of the electron beam. Unlike light microscopes, which have a fixed set of magnifications determined by the design of the lenses installed, an electron microscope's scan coils can freely vary the magnification between the maximum and minimum limits of their design.
In a scanning electron microscope the electron beam is focussed into a tiny spot on the surface of the sample (as an aside, this is the opposite of how light microscopy works, where the illumination is diffuse and the image is focussed on the surface of the detector). The height above the sample stage at which the electron beam converges is called the focus, and can be adjusted by electromagnetic coils, which are one of the SEM's "lenses".
Because the insect samples are not flat, you must adjust the focus either up or down to get the clearest image. If your image looks blurry, try adjusting the focus either up or down. If it appears to be getting blurrier, adjust it in the opposite direction until the image looks sharp.
For your Bugscope session we use the most common SEM detector, called a Secondary Electron Detector or SED. The brightness in the images is primarily due to the topography of the sample surface (for a more detailed explanation, please see our tutorial animation). Sometimes the range of brightness is too much for us to view, so the brightness and contrast controls allow us to select the range we're interested in.
The brightness control has the effect of making the whole image lighter and darker. The contrast control exaggerates the difference between the lightest and darkest regions in the image. An image with low contrast will appear flat and gray while an image with high contrast will have bright whites and dark blacks. Having the contrast too high or too low can either obscure fine details or make them too difficult to see.